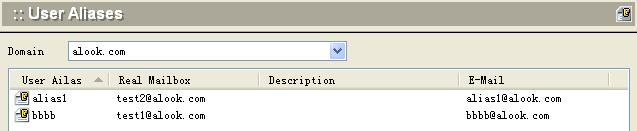
User Aliases
You can create aliases to be used in place of full user names. Select User Aliases from the main menu. The following screen will appear.
Add User Aliases
To add a user alias, click the Add button. The following dialog box will appear.
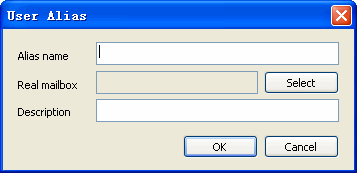
.First select the user name for which you want to create an alias, using the Select button. A list of all current user names will appear, as shown in the following dialog box.
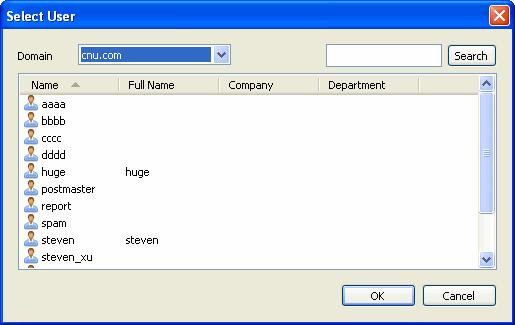
- .Select the user name and click the OK button to return to the User Alias dialog box. The selected user name will be filled in as "Real mailbox."
- Enter the user alias to be used for this user name.
- If desired, enter a more complete description of this user for reference.
- Click OK to create the user alias. The user name, alias name, and description, if used, will appear on the list of user aliases.
Modify User Aliases
To modify user alias information, select the user name from the User Alias list and click the Modify button.
- You can change any of the fields: alias name, actual user name, or description.
- Click OK to accept the change. The changed record will appear on the User Alias list.
Delete User Aliases
To delete a user alias, select the user name from the User Alias list and click the Delete button. A confirmation message will appear. Click Yes to proceed with deleting the user alias.