Scheduler
Use the Scheduler function to set up tasks to be run at regularly scheduled intervals, such as sending mail to external domains, downloading ETRN or POP3 mail, and clearing old email from the server.
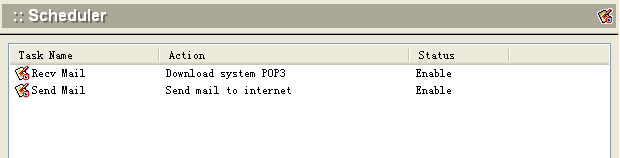
Select Scheduler from the System Setup menu. The following screen will appear.
To add a scheduled task, click the Add button at the bottom of the screen. The following dialog box will appear. 
Use the following table for reference while completing the fields in the dialog box.
| Name | User-defined task name |
| Enable | Check this box to put this task into action when you click OK. |
| Scheduled Interval | Choose either a specific date and time to perform this action, or a time interval, for repeated actions. 1)Select a date and time using the pull-down menu options 2)Enter the interval of time between each repetition of the task. 3)Use the Time Span button (see Figure X) to specify start and stop times, and to further refine the days of the week on which the task will be performed. 4)If there is no specific start time or end time for the task, set start time equal to end time. 5)Check the boxes for the days of the week on which you want the task to run. |
| Actions | Select the action to be performed by this task. Download system POP3: Retrieve all enabled POP3 account mail Download ETRN mail: Retrieve all enabled ETRN account mail Download user's POP3: Download mail from the user's outside POP3 webmail account Delete user's mailbox: Clear out of all users' mailboxes on the server any mail older than the specified number of days Deal with unused mailbox: Delete/Disabled user accounts |
| Parameter Setup | Establish the following parameters for performing specific actions. Only those options available for the selected action will be enabled. |
| Delete user's mail | Enter the number of days to allow email to remain on the server, or choose from the pull-down menu. |
| Deal with unused mailbox | Enter the maximum number of days a user account can remain active if the user does not login. If the user does not login within this time frame, the user's account will be deleted. |
If you are selecting a time interval for actions, click the 'Time Span...' button. The following dialog box will appear as an aid in setting time intervals and cycles.
If you are selecting some special users for actions, click the 'Action for...' button. The following dialog box will appear as aid in selecting users for actions.
 .Click OK to accept the Scheduler settings.
.To modify an existing Scheduler task, select the task from the Scheduler screen and click the Modify button.
.To delete an existing Scheduler task, select the task from the Scheduler screen and click the Delete button.
.Use the Refresh button to update the database and refresh the screen.