Public Contacts
All user information, including account profiles and external addresses of mail servers, are stored in LDAP and can be searched by users with Outlook and Webmail.
To work with public contact information, select Public Contacts from the Users and Groups screen. The following screen will appear.

To add a new public contact record, click the Add button at the bottom of the screen. The following dialog box will appear.
Add Public Contact Information
Contact Information
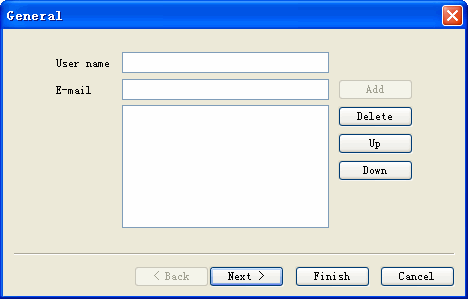
- Enter user name and email address. .Email addresses will be listed in the order shown. Use the Up or Down button to change the priority order.
- Click Next to proceed to two more screens of information.
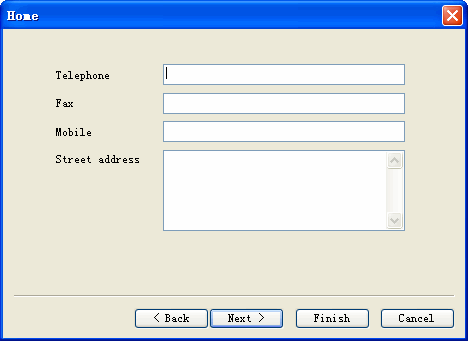
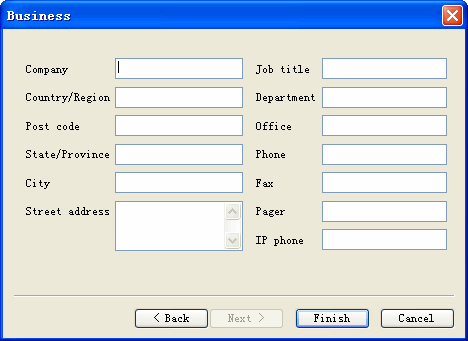
- Fill in the fields you wish to make publicly available, and click Next to proceed.
- Click Finish when the information is complete.
Home Information
Business Information
Modify Public Contact Information
To modify public contact information, select the public contact record from the main Public Contact list screen, and click the Modify button. The following dialog box will appear.
Note: User name modification is not allowed.
- Select the tab containing the information to be modified.
- Change field information as needed.
- Use the Up or Down button to change the order in which email addresses appear.
- Click the OK button when finished. The changed public contact record will appear on the main Public Contact list screen.
Delete Public Contact Information
To delete a Public Contact, select the Public Contact record and click the Delete button. A confirmation message will appear. Click Yes to proceed with deleting the public contact record.
Note: Deleting contacts from LDAP public address book does not affect the user account system information.
Import Public Contact Records
Importing a file of Public Contact records functions the same way as importing a file of user records. To import a file containing public contact records, click the Import button on the Public Contacts screen. The following dialog box will appear.
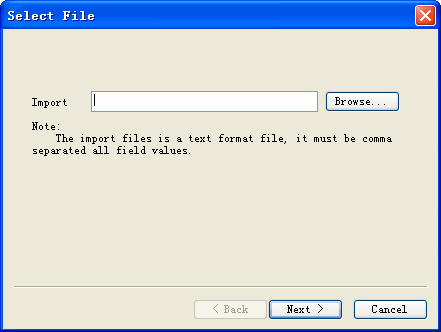
- Click the Browse button to select the file to be imported.
- Choose the character used in this file as a comment character.
- Choose the character used in this file as a field separator.
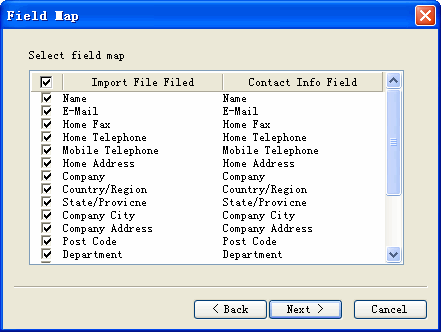
- Click the Next button to bring up the Field Map.
- Select the fields to be included in the imported file by checking their boxes.
- If a mailbox name is missing a domain name, enter the default domain name to be used.
- Select Random if you want the system to randomly generate a password, when one is missing. Select Fix if you want the system to use one password for all the records, and enter the password in the text box.
NOTE: The import function will not overwrite existing records. Only records with new information will be imported.

Export Public Contact Records
To export a public contact record, select the record on the main Public Contacts list screen, and click the Export button. The following dialog box will appear.
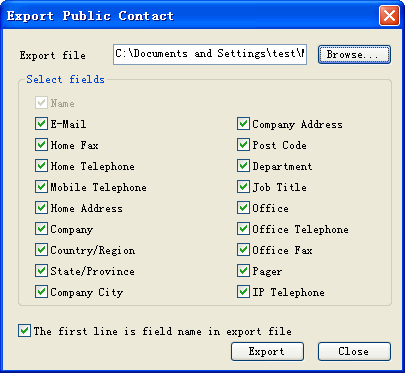
- .With the cursor in the Export file text box, click the Browse button to create a default export file name. The default file for the currently shown domain will be selected.
- Browse to the location to which you want the file exported, open and save.
- The path will now appear in the Export file text box. Click the Next button to bring up the Field Map.
- Select the fields to be included in the exported file by checking their boxes.
- If you want the first record in the exported file to be the field names, check the box at the bottom of the dialog box.
- Click Export to export the selected file to the selected location. A confirmation message should appear.
NOTE: You can only export each file one time.