Users
Add Users
To add a user, click the Add button at the bottom of the screen. The following dialog box will appear.
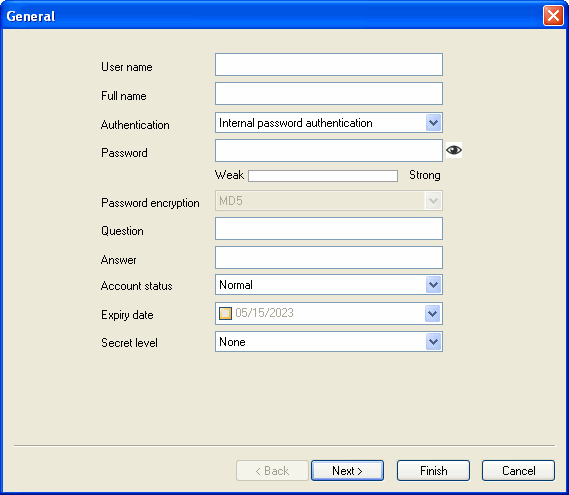
Use the following table for reference while completing this dialog box.
| User name | Login account of mailbox. |
| Question | The question will display when getting passoword |
| Answer | The answer will require when getting passoword |
| Authentication/Password | (1) Internal data authentication requires a password to be entered; (2) NT domain authentication will use account and password from domain settings. |
| Account status | Select from the pull-down menu: (1) Normal - account is working properly. (2) Disable - account is not working properly or has been disabled. (3) Pending - the new Webmail registration is waiting for approval of Winmail administrator. (4) Suspended - Suspended users can receive emails but cannot log in. |
| Expiry date | The expiry date of mailbox. |
Click the Next button to proceed to the User Information dialog box.
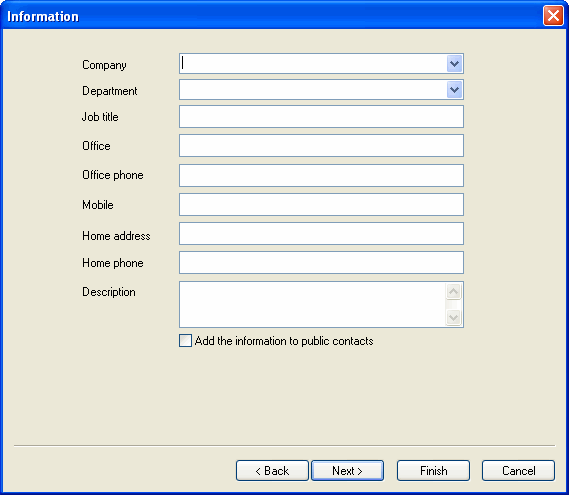
Enter the requested information for the user.
Check the box at the bottom if you wish to make this user¡¯s information accessible through the public contact features.
Note: To add user profile information to the public address book contact list, the public address book contact list function must be enabled.
Click Next to proceed to the User Group dialog box.
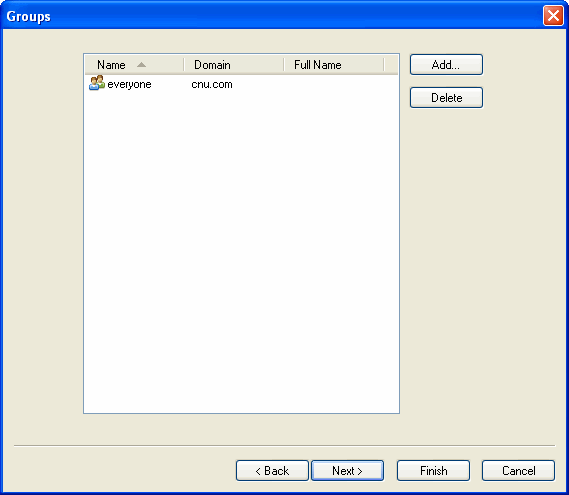
Names, domains, and descriptions of groups that have been set up in Winmail Server will be listed in this box.
Highlight a group and click the Select button to make this user a member of the selected group.
Click Next to proceed to the Quota dialog box.
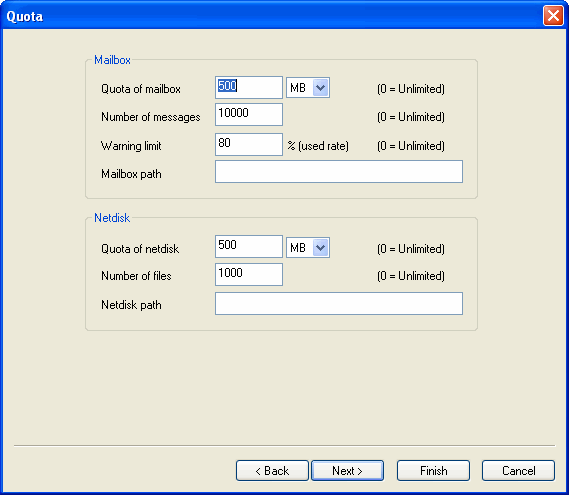
Use the following table for reference while completing this dialog box.
| Mailbox quota | Maximum mailbox storage capacity. |
| Number of messages | Maximum number of incoming email messages that can be stored. |
| Warning limit | Percentage of capacity to be used as warning limit. User will receive a warning message when mailbox size reaches the percentage. A value of 0 indicates no limit set. |
| Netstore quota | Maximum network store storage capacity. |
| Number of files | Maximum number of uploading files that can be stored. |
| Max. size of send | The max message size of a mail sent from the user. |
Click Next to proceed to the User Permissions dialog box.
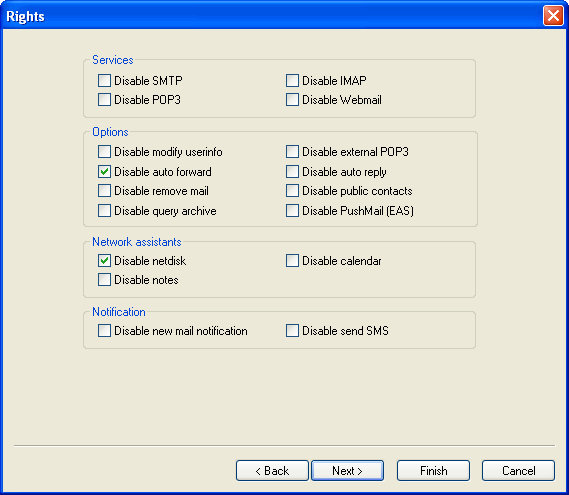
Use the following table for reference while completing this dialog box.
| Disable SMTP | Check this box to prevent the user access SMTP. |
| Disable POP3 | Check this box to prevent the user access POP3. |
| Disable IMAP | Check this box to prevent the user access IMAP. |
| Disable Webmail | Check this box to prevent the user access webmail. |
| Disable modify userinfo | Check this box to prevent the user modify user information. |
| Disable external POP3 | Check this box to prevent the user setting external POP3. |
| Disable auto forward | Check this box to prevent the user auto forward message. |
| Disable auto reply | Check this box to prevent the user auto reply message. |
| Disable remove mail | Check this box to prevent the user remove mails. |
| Disable public contacts | Check this box to prevent the user access public contacts. |
| Disable netstore | Check this box to prevent the user access network store. |
| Disable calendar | Check this box to prevent the user using calendar. |
| Disable notebook | Check this box to prevent the user using notebook. |
Click Next to proceed to the Sending/Receiving dialog box.

| Sending | Set the following options: "Deny sending mail to other of this domain", "Deny sending mail to other domain in the system", "Deny sending mail to remote domain " |
| Receiving | Set the following options: "Deny receiving mail from other of this domain", "Deny receiving mail from other domain in the system", "Deny receiving mail from remote domain" |
Click Next to proceed to the Flow Control dialog box.
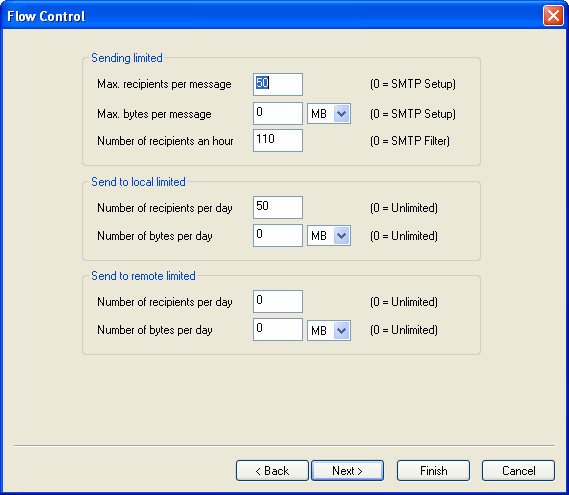
Use the following table for reference while completing this dialog box.
Click Next to proceed to the Access Control dialog box.
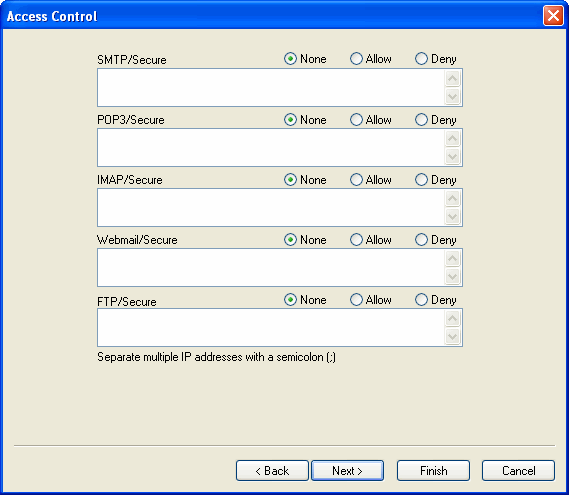
Set up SMTP/Secure SMTP, POP3/Secure POP3, IMAP/Secure IMAP, Webmail/Secure Webmail, FTP/Secure FTP services allow and deny of IP addresses.
Click Next to proceed to the Forward/Reply dialog box.
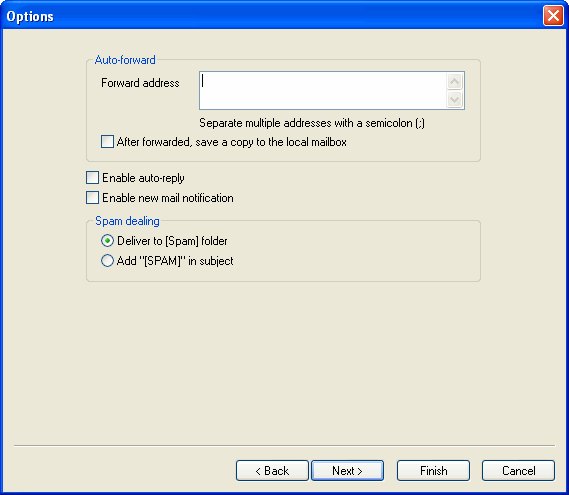
| Forward address | When auto-forwarding is set up, all email sent to the user account will be automatically forwarded to the specified mailbox. |
| Save a copy of forwarded mail | When mail is automatically forwarded, a copy will be retained in the local mailbox as well. |
Click Finish when you have completed entering all user information.
Modify User
To change existing user information, select the user name from the list in the main Users screen and click the Modify button.
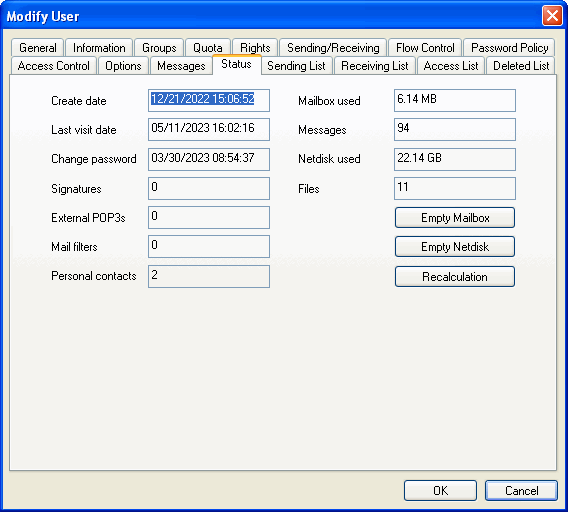
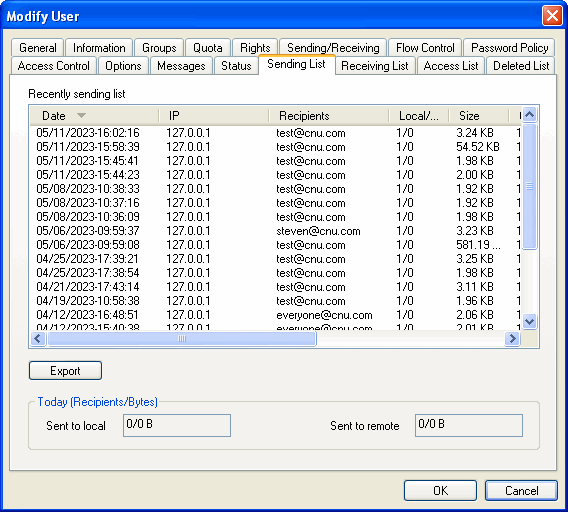
Select the tabs that contain the information you wish to change. Each screen is identical to the corresponding Add User screen, except for the Status, Sending List, Access List tab, shown below.
Status dialog box
Sending List dialog box
Access List dialog box
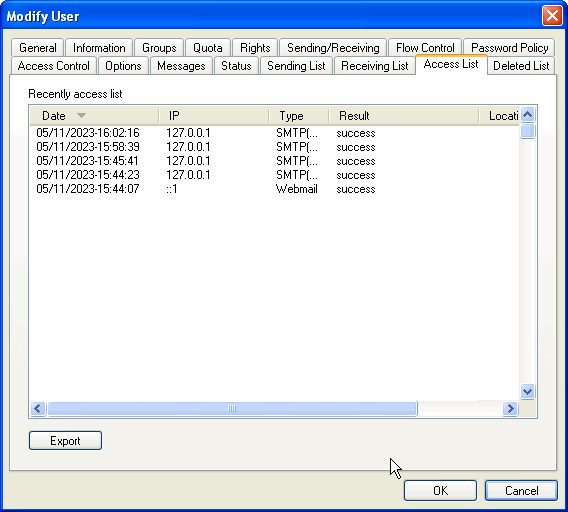
Because you are modifying the record for an existing user, some mail is likely to already have been sent and received. This dialog box displays information on current amount of space and number of messages, and allows the administrator to reset quotas or to empty mailboxes (for instance, when an employee leaves).
Delete Users
To delete a user record, select the user from the main Users screen and click the Delete button.
Note: Deleting a user record also deletes all the user's email.
Import Users
1. Import from file
Winmail Server allows the administrator to import a file of email user accounts from a different system. From the main Users screen, click the Import button. The following dialog box will appear.
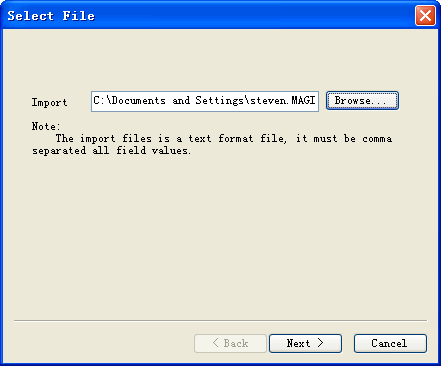
- Enter the name of the file to be imported, or browse for it.
- Select the symbol used in the import file for remarks.
- Select the symbol used in the import file as the field delimiter.
- Click Next to proceed to the Field Map dialog box.
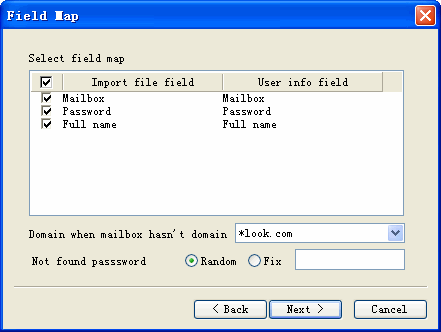
- Check the box to select the field mapping relationship between the imported file and Winmail user records.
- Enter a domain name if the mailbox does not have a domain associated with it.
- Check Random to randomly create a new password. Check Fix to use the value entered in the text box.
- Click Next to proceed with the file import. If the file size is large, the import may take several minutes. Import results will be displayed in the following dialog box.
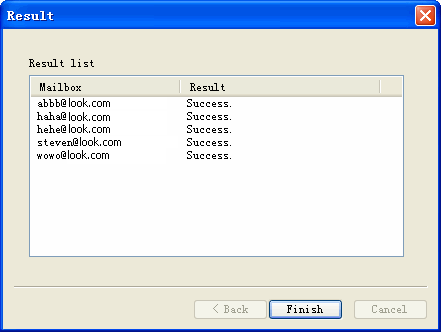
Click Finish to complete the import process.
2. Import from windows
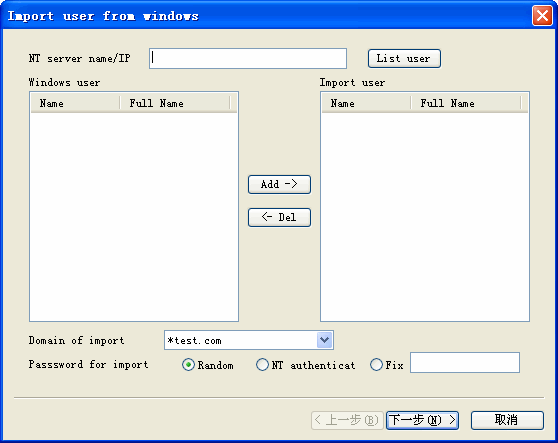
- Enter the hostname or ip address of the nt server, and click list user.
- Select the windows user for import.
- Enter a domain name if the mailbox does not have a domain associated with it.
- Check Random to randomly create a new password. Check Fix to use the value entered in the text box.
- Click Next to proceed with the file import.
Export Users
Winmail Server allows the administrator to export a file of email user accounts to a different system.
From the main Users screen, click the Export button. The following dialog box will appear.
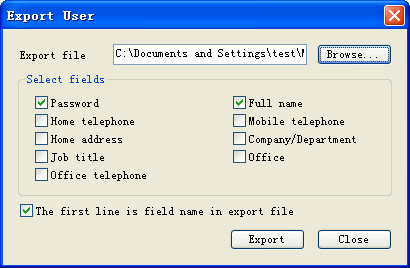
- Enter the name of the file to be imported, or browse for it.
- Check the boxes corresponding to the fields to be included in the export.
- Check the box at the bottom if the first line of data is field name headers.
- Click the Export button to perform the file export.
Bulk Update
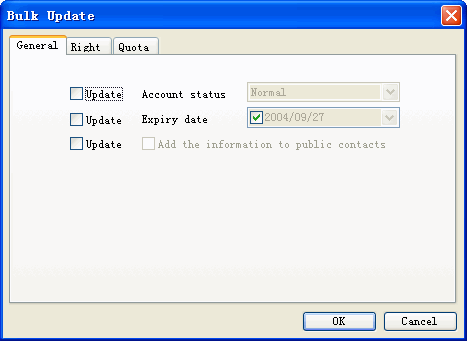
- Select some users for bulk update.
- Check the boxes that will update.
- Click the OK button to perform user update.
Refresh
Update data from back database and renew interface.
Non-main domain user should write whole address while setting up pop3 in Outlook or Eudora, for example, a user named test in non main domain abc.com the account should be written as test@abc.com.